Digital Magic 8 Ball

[sjm4306] had a small Magic 8-Ball key chain as a kid. The fluid in this key chain eventually dried up, and if [sjm] is anything like us the 20-sided die is now lost to the sands of time or at the very least hidden in a box in the basement. After remembering the old Magic 8-Ball one day, [sjm] decided to build a digital version of everyone’s favorite bewitched billiard ball.

The digital magic 8-ball uses a PIC16f886; more than enough to hold the twenty possible replies from a real magic 8-ball. The display is a tin 3 cm OLED which surprisingly emulates the ‘icosahedron with raised letters floating in purple liquid’ aesthetic very well.

Right now, this is just a breadboard prototype – there isn’t an accelerometer or tilt switch in the build yet, so shaking the project does absolutely nothing. [sjm] may add that functionality later by turning his project into a watch, key chain, or installing it in a real Magic 8-Ball case.

[Matt's] bubble display updated

[Matt] emailed in to show us how he has improved his bubble display since the last time we saw it. If you recall from last time, he was having issues with the air pressure dropping when multiple bubbles were released, resulting in smaller bubbles. This time around, he has added an aesthetically pleasing air reservoir to help ensure that his bubbles don’t vary too much. There really wasn’t a reason to use two containers for the reservoir, aside from the fact it is what he had on hand. He has also torn part the part of the display that houses the oil, replacing it with individual tubes for each vertical segment. This makes it easier to regulate the speed of the bubbles, as he found they travel at a constant rate if they are in contact with the edges of the tube.

One downfall of using the vinyl tubes is the fact that it comes in a giant roll. This leaves the tube wanting to curl. To get around this, he stretched it on a wooden dowel and heated it with a heat gun till it relaxed. Using clear PVC or acrylic tubing would be an alternative but would be more expensive.

[Read more…]

Generating electricity with swing sets

[Guelherme Pena Costa] came up with an idea to light up a swing set using the motion of the people swinging on it to generate electricity. The goal was to get people to enjoy the playground at night and we think, this might actually be a pretty good way to achieve that. People love blink lights, especially if they are interactive.

To Light the LEd ropes, [Guelherme] has attached a gear motor to the frame of the swing set and an arm to the chain. When the swinger swings, it spins the motor generating between 6 and 10 volts at 230-400 mA. As you can see in the video below, that works fine to illuminate the LEDs, though we think a charging circuit to allow the lights to stay lit for longer would also be cool.

Project Octopus

You know who thinks building a robotic octopus is an awesome idea? EVERYONE. Apparently the idea is a solid enough idea that the European Commision has funded this project. The goal is to mimic the capabilities of the squishiest of the cephalopods in order to advance soft robotics. Or possibly to take over the world.  They are hoping to have a fully capable robot octopus with no rigid structures at all.

You may be thinking that making a squirming tentacle is easy business. What they are attempting however, is the actual movement of an octopus including extension/contraction as well as grasping. This requires a complex system of control wires as well as “artificial muscular hydrostats” to allow it to do all these movements. A flexible skin covered in sensors will be added to the final design.

extremely detailed light painting bar

[Matt Pandina] has been documenting his build of a very nice light painting bar on his G+ page. His light painting bar has 64 RGB LEDs being driven by an ATmega328P and four TLC5940 chips. He wrote his own libraries to talk to the TLC5940 as well as his own libraries to pull images off of a MicroSD card. He also wrote a cross-platform program that automatically converts a directory  of pngs to something the TLC5940s expect. He says the secret to getting his24-bit color correction looking right is gamma correction. It seems that when the LEDs were run too bright, he couldn’t get the colors quite right.  In case you’re curious, those images are 15 inches tall!

You can follow along through his posts as he starts with just a few LEDs and slowly updates and grows it to the impressive state it is at currently.

A much easier take on an Android garage door opener

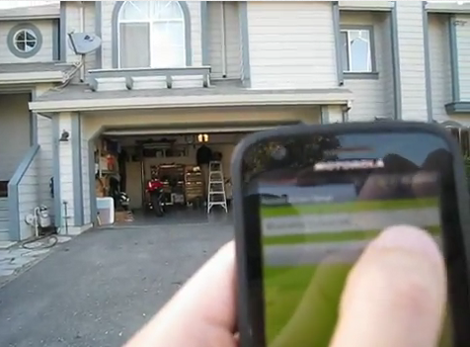
[Andy] is taking the complexity of a smartphone-controlled garage door down a notch with this project. He’s not interested in checking on the state of the door (open or closed) using a video feed, or in controlling the thing from anywhere in the world. He just wants to use his Android as the remote control and we say amen to that.

The circuitry in the garage is pretty simple. A relay is used to simulate a button press on the in-garage wired opener. This relay is driven by an Arduino which uses a Bluetooth shield for connectivity. Since his Android phone has a Bluetooth modem the rest of the project is just app development. As you can see in the video, the app automatically connects to the Arduino when it is launched, then waits for the button press to send the electronic equivalent of ‘Open Sesame”.

The project covers a series of posts so if you want to see how he got the app up and running make sure to browse through his archives. The next iteration for this app needs to be a background widget that enables Bluetooth, connects to the Arduino, and send s the open command all with one press.

[Read more…]