Bitbanging Super Smash Bros.

[Kyle] and an a few of his classmates are wrapping up a microcontroller interfacing class at Purdue and thought it best to send in the results of their efforts. It’s a version of Super Smash Bros. made by just bitbanging pins on a microcontroller.

The hardware for the project is based around a Freescale 9S12c32, an updated version of the 30-year-old M68HC11 microcontroller. For the controls, the guys used a Playstation 2 joystick and buttons housed in an Altoids box, and the actual console is made out of strips of wood stapled together to look like a crate from Super Smash Bros.

There are nine playable characters:  Pikachu, Captain Falcon, Yoshi, Donkey Kong, Mario, Luigi, Link, Kirby, and Fox. Despite these characters being only four pixels high, the game looks extremely playable (at least when two players don’t choose the same character). After the break is the video demo of Super Smash Bros: Bitbang edition, along with a gallery of pics showing the console and gameplay. All the code is up on GitHub for your perusal.
[Read more…]

Veronica gets VRAM and its own boot logo

[Quinn Dunki] just reported in on the latest iteration in her computer project which is called Veronica. This time she added RAM to increase the VGA performance of her build. Like just about every other part of the project, [Quinn] knew what she wanted to do, but had to overcome a lot of issues along the way.

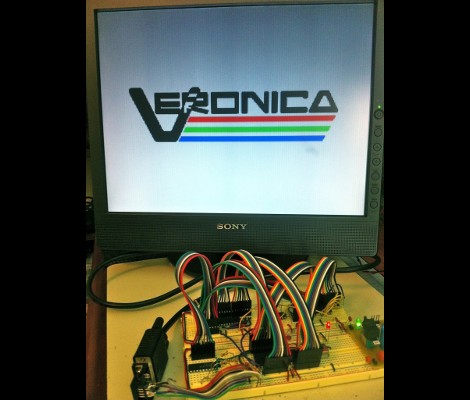
The goal is to implement a 256×240 display with 8-bit color depth. [Quinn] says this is on par with game console technology from the 1980’s. The problem is that the 10MHz AVR controller can’t really keep up with the scan rate of this size of display. The answer is to add RAM which stores all of the color data, the microcontroller will simply advance the address pointer on the memory chips to match the sync rate of the VGA output.

After hooking up her hardware design she gets a screen full of uninitialized pixel data. But moving from there to the final product seen above was quite frustrating. It turns out that noise on the breadboard was most of the problem, further compounded by entire breadboard row which wasn’t contacting the wires to make the temporary connections. A bit of jockeying for position and by Jove, she’s got a boot screen.

That breadboard sure has become crowded since her first VGA experiments.

ATmega324 acts as a GPU for homebrew computer

[Quinn Dunki’s] homebrew computer project is moving up another evolutionary rung. She needs a more versatile user interface and this starts with the data output. Up to this point a set of 7-segment digits has served as a way to display register values. But her current work is aimed at adding VGA output to the system.

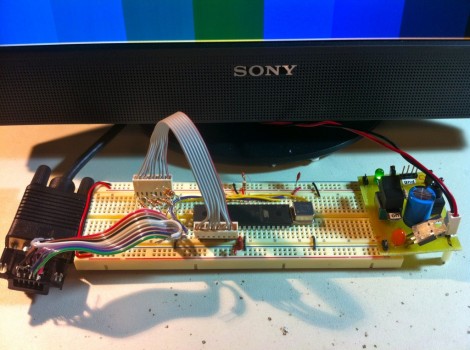
She starts off her write up by justifying the protocol choice. Although composite video would be easier to get up and running (we see it in a lot of AVR projects) [Quinn] doesn’t have a screen that will display composite video. But there’s also a lot of info out there about VGA signal generation. She delved into the specifics and even found a great AVR-based example over at Lucid Science.

The version seen above uses the 40-pin ATmega324. It’s a lot bigger than necessary for the example she put together, but in the future she plans to add video memory and will be glad to have all of those extra I/O pins. When it comes to video sync, timing is everything. She wrote the code to drive the display using assembly. In this way, she was able to look up the cycles used for each command to ensure that the loop is running with near perfect timing.

Building your own portable 3D camera

diy-3d-camera

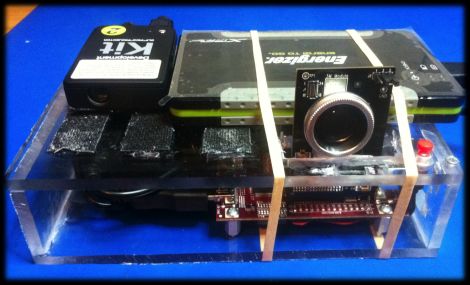
[Steven] needed to come up with a project for the Computer Vision course he was taking, so he decided to try building a portable 3D camera. His goal was to build a Kinect-like 3D scanner, though his solution is better suited for very detailed still scenes, while the Kinect performs shallow, less detailed scans of dynamic scenes.

The device uses a TI DLP Pico projector for displaying the structured light patterns, while a cheap VGA camera is tasked with taking snapshots of the scene he is capturing. The data is fed into a Beagleboard, where OpenCV is used to create point clouds of the objects he is scanning. That data is then handed off to Meshlab, where the point clouds can be combined and tweaked to create the final 3D image.

As [Steven] points out, the resultant images are pretty impressive considering his rig is completely portable and that it only uses an HVGA projector with a VGA camera. He says that someone using higher resolution equipment would certainly be able to generate fantastically detailed 3D images with ease.

Be sure to check out his page for more details on the project, as well as links to the code he uses to put these images together.