CRT vector graphics arcade game built from an FPGA board

[Sprite_TM] wanted to challenge his VHDL skills, and there’s no more satisfying way of doing this than making something that will be playable when you’re done. He decided to try his hand at creating a vector-based CRT arcade. The distinction here is that vector-based games take control of the magnetic ring that guides the electron path toward the screen. This technique allows point-to-point graphic generation rather than the pixel-based scanning that CRT televisions use.

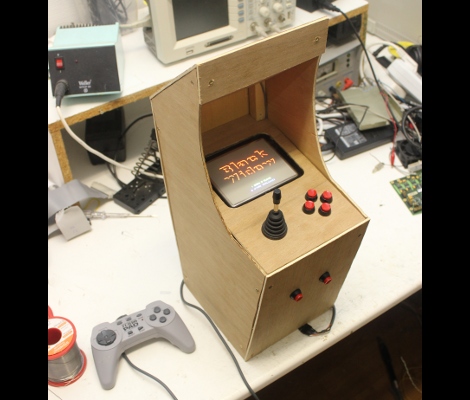
He had a small color CRT on hand and decided to grab a VHDL version of asteroids from the Internet to see if he could get it to work. But upon further inspection of the source he found that it had a chunk of code which rasterized the vectors for use with a scanning monitor. After removing that chunk, and giving it a spin he had enough confidence that he knew what he was doing to start implementing his own game. The choice of what title really came down to the hardware the original arcade cabinets used. He was not interested in implementing a soft-process for the math chips used in games like Star Wars and Tempest. In the end he got a version of Black Widow up and running, and even built a miniature cabinet for the thing. Check out some of the gameplay in the clip after the break.

[Read more…]

Becoming intelligent designers and saving the RepRap

While Hack a Day’s modus operandi is serving up hacks from around the Internet, sometimes we feel the need to exercise a bit of editorial freedom. A thousand words is a bit awkward for the front page, so feel free to skip the break and head straight to the full text of this article.

It’s no secret myself and my fellow writers for Hack a Day are impressed with the concept of a personal 3D printer. We’ve seen many, many, builds over the years where a 3D printer is a vital tool or the build itself.

Personally, I love the idea of having a 3D printer. I’ve built a Prusa Mendel over the past few months – Sanguinololu electronics, [Josef Prusa]’s PCB heated bed, and a very nice Budaschnozzle 1.0 from the awesome people at LulzBot. I’ve even made some really cool bits of plastic with it, including the GEB cube from the inside cover of Gödel, Escher, Bach (a very tricky object to realize in a physical form, but not a bad attempt for the third thing I’ve ever printed, including calibration cubes). Right now I’m working on the wheel design for a rocker-bogie suspension system I hope to finish by early August when the next Mars rover lands. My Prusa is a wonderful tool; it’s not a garage filled with a mill, lathe, and woodworking tools, but it’s a start. I think of it as the Shopsmith of the 21st century.

Lately I’ve become more aware of the problems the RepRap and 3D printer community will have to deal with in the very near future, and the possible solution that led me to write this little rant.

[Read more…]

Using the nook as a keyboard

[Andrew] has been pining for an Optimus Maximus – a keyboard with a small LCD screen in each key – for years. Like a lot of people, he love the idea of a completely configurable keyboard, but balked at the two thousand dollar price tag. Although it doesn’t have full color OLED screens behind each key, [Andrew]’s nook simple touch can be used as a keyboard just the same.

After rooting his new nook, [Andrew] had a very nice tablet computer, and the only Android device with an e-ink screen. Although[Andrew] never wrote an Android app before, he wanted to do a proof of concept build to see if a nook keyboard would actually work. The “keyboard app” is actually just a webpage hosted on his home server. When he presses a virtual key, JavaScript sends an ASCII value back to the server where it is decoded and sent to xte.

[Andrew] says his build works, but not very well. Opera mini doesn’t like the homebrew server he set up, and Cyrillic characters are a no go. Still, it works, and looks like an awesome application for an e-ink tablet with a proper Android app. Demo after the break.

[Read more…]

Storing sketches in the cloud

There’s a fine line between solving problems that don’t exist and solving problems that no one recognizes until a solution is found. The former shows up with housewares peddled on late-night infomercials, while the latter is summed up by [Henry Ford], “If I asked people what they wanted, they would have said faster horses.” [Dave]’s method of storing microcontroller code in the cloud definitely falls into the ‘useful’ category.

[Dave] first realized the problem when he was digging around the IDEO Toy Lab and came across an orphan project, a Barbie credit card swiper. [Dave] had no idea if the firmware for this project was saved on the server, or even if the current version was available. One solution to this problem could be burning a copy of the source onto the Flash or EEPROM on the board.

There’s a problem with this idea, though: storing the source in an Arduino’s memory takes space. Thinking laterally, [Dave] realized that editing source happens on a computer, computers are connected to the Internet, so why not keep the source “in the cloud?”

[Dave]’s solution is to host the source on GitHub, and tie every piece of code to a board’s unique USB serial number. This gives every Arduno a unique ID, allows for version control, and libraries of multiple files.

This very clever addition to the Arduino IDE is up on GitHub, ready to be added to any Arduino installation. Why the Arduino IDE doesn’t already have this feature is beyond us, but that’s what you get when you want a faster horse.

Analog clock display uses a Nipkow disk

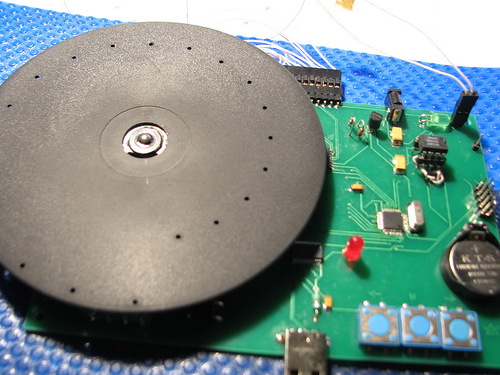
Although [Serokoy] is not thrilled with the outcome of his Nipkow disk clock (translated), but we really enjoy it. It uses the Persistence of Vision concept to create a light display from a rotating disk.

We’ve come across a lot of rotating disk clocks. Several were based off of the platters of a hard drive, using a slit, or series of slits to make up the display. This Nipkow disk uses a similar technique but in a more general way. The series of holes arranged in a spiral pattern allows a grid of concentric rings to be used as pixels when the disk is spinning. The bottom portion of the disk is used as the display area. Each pixel is illuminated at just the right time by LEDs below in order to freeze that pixel in the viewer’s eye. The demo is a bit rough, and [Serokoy] mentions that the precision of the hole layout makes all the difference. He drilled these by hand in a CD which was spray painted matte black. Even though he used a computer to lay out and print a template, it took four tries to get a suitable disk.

[Thanks Svofski]

Color changing coaster has a built-in drink detector

[Robert] put together his own illuminated coasters that know when they hold a drink. They look fantastic, thanks to professionally produced PCBs and a layered, laser-cut acrylic case. They’re much like the pagers given to restaurant-goes who are waiting for tables, but this version is much fancier (and doesn’t include the vibrating/paging feature).

The RGB-LED board is a previous project which was developed using eight surface mount RGB LED modules around a circular board. It uses an ATmega168 paired with an MBI5168 constant-current LED sink driver. The coaster enclosure gave him room for a few more items, like the pair of AA batteries which work in conjunction with a boost converter to power the device. It also houses an IR reflectance sensor which is used to detect the presence of a drink on the coaster. This is important since an on-occupied coaster looks like it would be blindingly bright if there wasn’t a glass to diffuse the intensity of the LEDs.

He mentions that incandescent light bulbs mess with the IR reflectance sensor. But there must be some way to account for ambient conditions with the code, right?