Recycle lithium cells by building custom flashlights

This isn’t a brightest flashlight in the world type of hack (but it does manage to push about 1000 lumens). [Stephen Webb] is finding a use for leftover parts by building his own simple LED flashlights. As you can see, he uses PVC parts available at any hardware or home store. These are a good choice; they’re cheap, light weight, resilient, designed to be water tight, they easily thread together and have connectors that reduce the diameter of the fittings.

The electronics use standard size cylindrical Lithium cells. These are found in many types of Laptop and Power Tool batteries. Often when one of those battery packs bites the dust it’s an issue of one or more bad cells. [Stephen] desolders the cells, and reuses the good ones in this project.

We didn’t see any mention of a recharging technique. Does anyone have any advice on how to top these cells off if they’re not in their original power pack form?

Monitor your heartbeat with a webcam and a flashlight

After seeing some heart rate monitor apps for Android which use the camera and flashlight features of the phones, [Tyson] took on the challenge of coding this for himself. But he’s not using a smart phone, instead he grabbed a headlamp and webcam for his heat rate monitor.

To start out he recorded a test video with his smart phone to see what it looks like to cover both the flash LED and camera module with his thumb. The picture is mainly pink, but there’s quite obviously a color gradient that pulses with each gush of blood through his skin. The next task was to write some filtering software that could make use of this type of image coming from a webcam. He used C# to write a GUI which shows the live feed, as well as a scrolling graph of the processed data. He took several tries at it, we’ve embedded one of the earlier efforts after the break.

[Read more…]

Laser so easy to build anyone can burn their eyes out

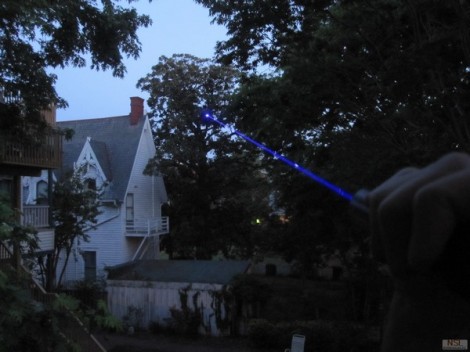
The boys over at North Street Labs built a handheld burning laser and made it look super simple. Well it’s not. We don’t think it’s hard either, but the only reason it looks so easy is because they really know what they’re doing.

The first step was to source the best parts for the application. They’re using a handheld flashlight body which is small but still leaves plenty of room for the components. Next they ordered a quality lens made for the wavelength of the diode, as well as a prefab driver board.

Now the real build starts. They hit the metal lathe and machined a housing for the diode out of some aluminum stock. To marry the parts together they applied some thermal paste, and used a wrench socket to protect the diode from the pressure the vice jaws exert. It slid into place and the whole thing fits perfectly in the flashlight housing. The project wouldn’t be complete without video proof of it burning stuff. You’ll find that after the break.

[Read more…]

A flashlight for any occasion

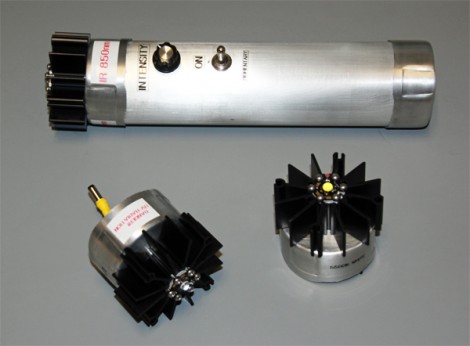
Whether you’re trying to light your path, build your own night vision, or do some tanning at home, this flashlight has you covered. [David Prutchi] designed the high power flashlight with three swappable heads.

He built the base unit out of aluminum pipe. It’s got plenty of room for the four 9V batteries that act as the power source. The driver circuit is just a bit smaller than one of those batteries, and to bring the whole thing together [David] and his helper added a potentiometer, toggle switch, and quick connector which makes head swaps a breeze. The heads themselves are all LED based, with one for visible light, another for infrared, and the final module outputs ultraviolet. We joke about tanning with it, but at 10 Watts you should be more worried about accidental damage to your vision.

The finished product is shown checking the security ink on some Canadian Currency. This would also make a nice secondary light source for your night vision monocle.

Doubling up on the USB supercap flashlight

[Antoine] wrote in to let us know that he soldiers on with his flashlight project. He’s doubled up on the supercaps and tripled the LEDs (translated).

The core concept has stayed the same since the original version. He wanted a flashlight that was small and used no batteries. This iteration came about as he looked at increasing the light output of the device. He’s switched to some warm-white LEDs which are easier on the eyes, but was unhappy with the charge life now that he’s using current at a faster rate. The solution, of course, is more potential from the capacitor. He’s now using two 10 Farad caps in parallel. We are a little skeptical about his capacitor theory and ended up using this lecture to defog the issue of parallel and series capacitance.

The upgraded hardware is right at home in that plastic egg like you’d find in a coin-op trinket vending machine. You’ll see there’s still a colored LED to warn when the charge is getting too low.

Supercap lights your way in times of need

You won’t find [Antoine] stumbling around in the dark. He just finished working on this LED flashlight which draws power from a super-capacitor (translated). He realized that lighting a high-efficiency LED takes so little power that there are many benefits in play when deciding to move away from batteries. When compared to a super capacitor, batteries have a shorter life span, are heavier, and take up more space.

The biggest drawback of a super capacitor in this situation is the low voltage operation. The output will start at 2.7V and drop as the current is discharged. [Antoine] used one of our favorite simple circuits to overcome this issue, the Joule Thief. That circuit is commonly seen paired with an LED in order to boost input voltage to a usable level. That’s precisely what’s going on here.

The final hack in his circuit is the addition of that red LED which you can see in the middle of the board. This takes the place of a Zener diode and drops the charging voltage to a safe level. That indicator light will not come on until the cap is fully topped off. This way it tells you when the device is done charging.