Powering a robot with a macbook battery

When [Soo-Hyun]’s friend had an Apple Macbook Pro battery that began to swell, his friend did the reasonable thing and donated it to be used in a robot. Now [Soo-Hyun]’s kiwi drive robot is powered by a gigantic LiPo battery, giving it a huge range and a very fast top speed.

The defunct laptop battery that formerly powered a 15″ macbook pro is three battery packs of two cells in parallel, delivering 12.6 Volts. To get the power to the robot, [Soo-Hyun] etched a simple PCB that fit into the slot in the battery. A little bit of soldering later, and mounting the battery as a shark fin because of the 8×8 inch limitation of maze-solving robots, the power plant was complete.

Using a bulging LiPo battery probably isn’t the smartest idea (listen for the great line, “it got the camera and my face” at 4:08), but as long as [Soo-Hyun] keeps an eye on the battery as it’s charging, it should be alright.

Check out the video of the robot zipping around on 12.6 Volts after the break.

[Read more…]

A Little Geneva Drive Made of Wood

MDF Geneva drive in action

Long ago, before servo motors and linear actuators were common, clever mechanical devices were what engineers used to produce the needed motion for their processes. The CNC-cut Geneva Drive may not be fit for industrial use, but this type of device has been used in everything from film projectors to rotating assembly tables. The constant rotation of the driving wheel is translated into intermittent motion by the [Maltese cross] driven wheel.

The drive and Maltese cross section of this particular drive are made out of MDF with the exception of a putty material that the motor shaft press-fits into. The article claims that this is the only Geneva drive in existence made out of MDF, however, we’d love to see that proven wrong in the comments!

If you’d like to make one of these yourself, CAD and G-code files are given for the hand-cranked version that this Drive is based off of in a separate post.  If you’re not familiar with how a drive like this works, or would just like to see everything in action, be sure to check out the video of it after the break! [Read more…]

Updating your workspace for more organized and efficient hacking

workspace-upgrade

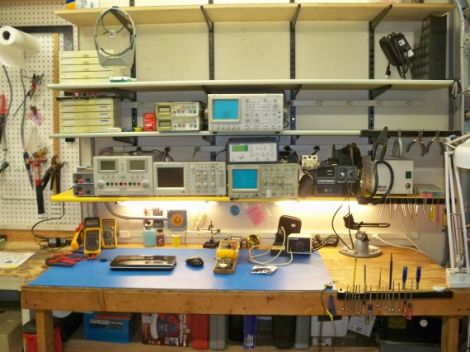
If you’ve ever looked at one of [Todd Harrison’s] teardown or how-to videos closely, you would likely notice that his work bench looks like a standard hacker workspace. While we all try to keep our work areas clear of clutter, it’s not uncommon for components to pile up, cords to tangle, and things to get messy. [Todd] decided it was time to get a bit more organized, so he recorded a video showing how he went about the process.

Part of [Todd’s] work revolved around adding shelves to his bench so that he didn’t have measurement equipment stacked on top of one another. He also spent a good amount of time adding 30 additional plug sockets to his work space, replacing the single socket he had been struggling with for years.

Obviously this is not really a hack in and of itself, though this sort of reorganization is an important to efficient hacking all the same. We like the fact that [Todd] took the time to explain his process and materials in great detail – it will no doubt be helpful to those new to hacking.

Continue reading to see [Todd’s] video in its entirety, or swing by his blog for more pictures and details.

[Read more…]

Quieting a pendulum clock every night

[Vinnie] has a wonderful old clock from his grandmother; it’s an exquisite antique with a real mechanical movement and a charming set of bells that ring every hour. Unfortunately, those chimes are a bit of a disturbance to neighbors at 2 o’clock in the morning. Previously, [Vinnie] had been stopping the clock every evening, and hoped he would remember to start the pendulum in motion 12 hours later. This was a chore, so he decided to automate the process.

The build is simple and clever; a small stepper motor is mounted in the clock just underneath the pendulum. Every 12 hours, the stepper motor moves a lever and slowly stops the pendulum over the course of a dozen or so seconds, silencing the clock movement. Twelve hours later, the motor turns again setting the pendulum in motion.

The parts count for this build is very low – basically just an ATmega88, a Darlington array to drive the stepper, and a 32.768kHz crystal. We can think of a few friends and relatives with loud clocks in their house, so we might have to build a few of these to give away.

Take a look at the demo video after the break to see how [Vinnie] stops his grandmother’s clock every night.

[Read more…]

Sand Flea literally leaps tall buildings in a single bound

The hidden abilities of this robot that is no larger than a dinner plate are quite impressive. It doesn’t let an obstacle like a building get in its way. The Sand Flea, like its namesake, posses a remarkable jumping ability. When it encounters a tall obstruction two levers incline the front of the robot and it launches itself up to thirty feet in the air. In the case of a one-story build this means it will end up on the roof, and it’ll do so much quicker and more reliably than any wall climber we’ve seen.

It’s being developed for the US Army by Boston Dynamics, and this isn’t the first time we’ve seen the concept. But the video after the break gives a much better look than the grainy twenty-second clip from last year. Of course they’re not giving up too many details so we have to guess a bit. We’d wager the launching mechanism is a solenoid, but at about eleven pounds you need a lot of juice to get that much of a jump. We suppose it’s also possible that there’s an explosive system like the butane combustion used in a framing nailer. The video summary mentions that there’s a stabilization system to keep the body oriented during flight. That’s got to be a gyroscope. Let us know what you think in the comments. [Read more…]

Wireless camera mount offers pan and tilt functions

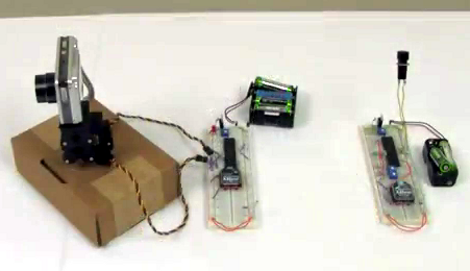
[Chris] put together a bunch of common components to create this wireless pan and tilt system for a security camera or a robot.

The motorized base is simple enough, using two servos to make up a mount for the digital camera. In this case he used a parts package which is designed to mount the servos perpendicular to each other. You could also 3D print, our build your own brackets quite easily. The control circuitry consists of a pair of PIC 18LF4520 microcontrollers and a set of Xbee modules. This is where the wireless connectivity comes in.

On the transmitter side, a pair of potentiometers are read by the microcontroller’s ADC and translated into position values. The receiver takes those values and drives the servo motors accordingly. In the clip after the break [Chris] is using micro trimpots which require a screw driver to adjust. You might want to hit the parts bin and see if you can get some that have a more user-friendly shaft or knob.

Unfortunately this system doesn’t transmit video. But WiFi webcams are getting quite affordable so that might be a good option in this case. [Read more…]