Semaphore signal replica perfect for the train buff in your life

semaphore-signal

[John Philip’s] brother has a sizable room set aside for his model railroad setup, and he was looking for something interesting to add to his brother’s collection. Rather than construct something for the railroad itself, he decided that an early 1900’s-style semaphore railroad signal would make a great novelty item for the room.

The project started with [John] scouring the Internet for colored signal lenses. Once he found a set that worked for him, he crunched some numbers to ensure that the rest of the semaphore box stayed true to original scale. Inside the signal’s case you will find a small regulator board for his light source, an Arduino, and a motor controller board to actuate the arm.

To ensure that the signal arm is always perfectly positioned, he installed a pair of reed switches on either side of the case, enabling the Arduino to auto-calibrate the signal’s position each time it is powered on. At first, this control scheme might strike you as a bit over the top, but we really like the fact that the signal can always configure itself to function perfectly, even if someone tinkers with/bumps into/moves the arm at any point.

Be sure to stick around to see a short video of the semaphore signal in action.

[Read more…]

Projector calibration on uneven surfaces made easy

projector-calibrator

If you are thinking of building your own flight/racing sim setup at home, you might want to check this out. [Alex] from the Garoa Hackerspace in Säo Paulo, Brazil put together a slick setup that makes projector image calibration a breeze.

When building a wraparound screen for such a simulator, you are likely to run into problems with both overlapping images and distortion from the curved projection. There are projectors that can easily adjust themselves to work in this sort of setup, but they are often very expensive, so [Alex] thought he would build a solution himself.

After studying a paper written by [Johnny Chung Lee] in 2004, he built a prototype display calibrator last year that used similar, though slightly tweaked methods to get the job done. This time around, [Alex] has improved his calibrator, making the process more precise and a bit quicker.

Light sensors and an Arduino are attached to the back of the projection medium, and a large broad scan of the screen is performed by the projector. His code then triggers an additional sweep of each corner to better estimate the exact edges of his projection surface. Since the video is tweaked in software rather than relying on the projector hardware to handle the task, the result is cheap and very accurate.

Don’t take our word for it though, check out [Alex’s] video demonstration below to see his calibrator in action.

[Read more…]

Display Twitter on an Arduino

If you ever wanted your name out on the Internet, now is your time to shine. [Chris] hooked up an Arduino to the Internet and is streaming the results of combing through Twitter live to the entire world.

The SocialBot9000, as [Chris] calls his build, is an Arduino Uno connected to an Ethernet shield and an LCD character display. The firmware uses the Twitter API to search for recent posts containing the phrase, ‘socialbot9000.’ A PHP script on the Arduino does all the heavy lifting and with the great Bildr tutorial on getting the Ethernet shield up and running, [Chris] was off to the races.

Because it’s extremely doubtful that everyone on the Internet could manage typing a message into Twitter that would be correctly parsed by the SocialBot9000, [Chris] put a small form up on the build log that will correctly generate the message and take you to your Twitter account for posting. After all that was done, [Chris] decided to have some fun and set up a live feed from a camera in front of the LCD display for the world to watch.

Winning video games by letting Arduino push your buttons

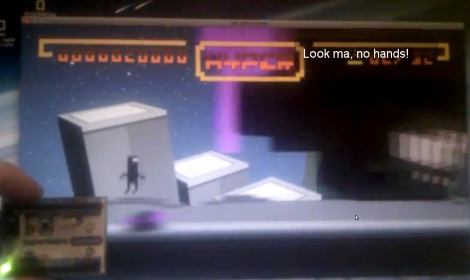
[Lars] shows you how to get a perfect score on the first four levels of BIT.TRIP RUNNER by using an Arduino to time and send button presses. This is a pretty simple game that uses a couple of buttons to jump or slide past obstacles. The constant speed of the character makes it quite easy to time these movements without any input from the game. This means that the pixel sampling which some web-game bots use isn’t really necessary here. Just work out the timing and hard-code it into the sketch. As you’ll see after the break, it works perfectly

The real value of this hack is the guide he wrote to send key presses from the Arduino hardware. It’s not hard at all, but there are several steps and this will get you up and running in no time. Where might you go from here? It wouldn’t take much to turn this into a keyboard prank that misspells all your words.

[Read more…]

Autonomous metal detector lets you sit back, get rich

thunderbird7-autonomous-metal-detector

As a kid, metal detectors seemed like great fun. Every commercial I saw beckoned with tales of buried treasure “right in my own back yard” – a bounty hard for any kid to pass up. In reality, the process was both time consuming and tedious, with little reward to be had. [Gareth] liked the idea of scouring the Earth with a metal detector, but he liked sitting and relaxing even more. He decided he could easily partake in both activities if he built himself an autonomous metal detecting robot.

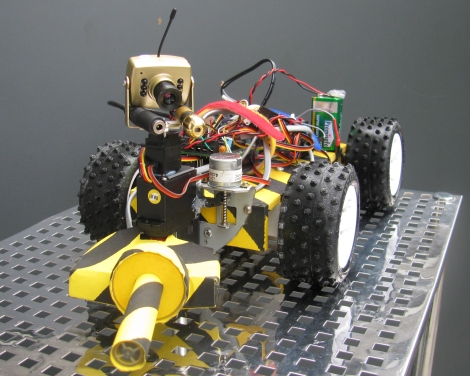
He stripped down a hand held metal detector, and installed the important bits on to the front of an R/C chassis. An Arduino controls the entire rig via a motor shield, allowing it to drive and steer the vehicle while simultaneously sweeping the metal detector over the ground. He fitted the top of the rover with a camera for remotely watching the action from the comfort of his patio, along with a laser which lets him pinpoint the location of his new found goods.

Continue reading to see a short video of the robot in action, and be sure to check out his site for more build details.

[Read more…]

Flash an Arduino from an SD card

[Kevin] has been working on reverse engineering the protocol used by the Arduino IDE and porting it to the Arduino platform. Now that his BootDrive project is nearing completion, he’s ready to give every Arduino the ability to program another Arduino over an SD card.

BootDrive isn’t terribly different from using an Arduino as an ISP, only now AVRdude runs on the Arduino itself and no computer is required to put new firmware into the target Arduino.  [Kevin] attached a MicroSD breakout board to an Arduino-compatible clone. When the clone starts up, it searches the SD card for a file called ‘program.hex.’ This file is sent over to the target Arduino and the new firmware is installed.

While it may not be extremely practical if you’ve only got a few Arduinos that never leave your workbench, we’re thinking this would be an invaluable tool if you need to update the software on a board already ‘in the field,’ serving as a weather station or homemade game camera. [Kevin] put up a demo of his BootDrive project; you can check that out after the break.

[Read more…]