Communicating from anywhere with a SPOT Connect

[Nate] over at Sparkfun put up a great tutorial for using the SPOT personal satellite communicator with just about any microcontroller. These personal satellite transmitters were originally intended to pair with the bluetooth module of a smart phone, allowing you to send a short 41-character message from anywhere in the world. Now, you can use these neat little boxes for getting data from remote sensors, or even telemetry from a weather balloon.

[Nate]’s teardown expands on [natrium42/a>] and [Travis Goodspeed]’s efforts in reverse-engineering the SPOT satellite communicator. The hardware works with the Globalstar satellite constellation only for uplink use. That is, you can’t send stuff to a remote device with a SPOT. After poking around the circuitry of the original, first-edition SPOT, [Nate] pulled out a much cheaper SPOT Connect from his bag of tricks. Like the previous hacks, tying into the bluetooth TX/RX lines granted [Nate] full access to broadcast anything he wants to a satellite sitting in orbit.

We’ve seen the SPOT satellite messaging service put to use in a high altitude balloon over the wilds of northern California where it proved to be a very reliable, if expensive, means of data collection. Sometimes, though, XBees and terrestrial radio just aren’t good enough, and you need a satellite solution.

The SPOT satellite service has an enormous coverage area, seen in the title pic of this post. The only major landmasses not covered are eastern and southern Africa, India, and the southern tip of South America. If anyone out there wants to build a transatlantic UAV, SPOT, and [Nate]’s awesome tutorial, are the tools to use.

Tip ‘o the hat to [MS3FGX] for sending this one in.

DIY battery powered soldering iron

When it’s time to get started on a project and put our irons in the fire, we usually reach for a nice Weller or Hakko soldering iron. Unfortunately, that isn’t possible when we’re soldering something away from a wall outlet. Portable soldering irons usually range from slightly to completely terrible, and [Adam] thought he could do better. He put together an Instructable for a portable battery-powered soldering iron that’s extremely easy to build.

[Adam]’s project mounts a standard Radio Shack soldering iron tip in an E-10 flashlight bulb socket. Power is provided by 6 Volts of AA batteries, with a small switch added for the obvious safety concerns. Although [Adam] could have added a small project box, he chose to build his entire project around a piece of wood. This is an excellent choice in our humble opinion; wood doesn’t melt, has very low thermal conductivity, and anyone using this iron should be smart enough to turn it off if the handle starts smoking.

While this isn’t the best possible portable soldering iron (we’re partial to the disposable-lighter-fueled torches with a soldering iron attachment), it’s much better than the ColdHeat soldering iron that received consistently bad reviews.

Edit: [Adam] updated his build to be a little safer after this story was posted. We changed the original title pic to reflect this; here’s the old one.

Wooden CNC touch probe

diy-touch-probe

[Gary] sent a few pictures of his latest project our way via Flickr, which we thought a few of you CNC owners might be interested in. He has been working with his CNC machine a lot lately and decided it was about time he built a touch probe for his rig.

His initial goal was to use the touch probe to ensure his CNC table was perfectly level, but we’re thinking it will be helpful for a lot of different projects in the future. [Gary] says he was really looking to put together a proof of concept device, but that things worked out so well he had to share.

His probe seems to work very well, even without the fit and finish of others we’ve seen in the past. The body of the probe itself was built using several layers of quarter inch plywood, housing three sets of two screws. The screws are wired together in order to form a closed circuit when the brass probe is inserted. When the probe makes contact with a solid object, the circuit is broken, and the coordinates of the probe’s head are recorded.

Though [Gary] admits that he was not super careful when it came to building the probe, we think the results speak for themselves. For a first iteration its scanning abilities are pretty impressive – we can’t wait to see version 2.

Rabiscoscopio – Oscilloscope drawing made easy

Rabiscoscopio

If you own an oscilloscope, sooner or later the urge to see something other than signals on the screen will strike. Some people ignore the urge and go about their normal business while others give in, spending hours carefully crafting images, games, and more. The process is time consuming and tricky as our own [Kevin Dady] discovered, but rewards come in the form of geek cred and are hard to pass up.

[Alex] wanted to draw on his oscilloscope, but decided that he would try something other than the microcontroller-based solutions we have seen in the past. He figured the easiest and most accessible way to draw on the scope was with sound, so he whipped up a small application he calls Rabiscoscopio to do most of the work for him.

He starts off by drawing an image using a single line, saving it as an SVG file. This image is converted into an audio file by Rabiscoscopio, which can then be fed directly into his oscilloscope from his PC. That’s all there is to it – it really doesn’t get much easier.

While you could claim that [Alex] is cheating his way through the oscilloscope drawing process, we think his application rocks – after all, hacking is about making your technology work for you rather than the other way around.

Give Rabiscoscopio a try and post the results here or in our Flickr stream – we’d love to see what you guys come up with.

In the meantime, check out the video below to see [Alex’s] attempt at replicating the Garoa Hackerspace logo on his scope.

[Read more…]

Updating your workspace for more organized and efficient hacking

workspace-upgrade

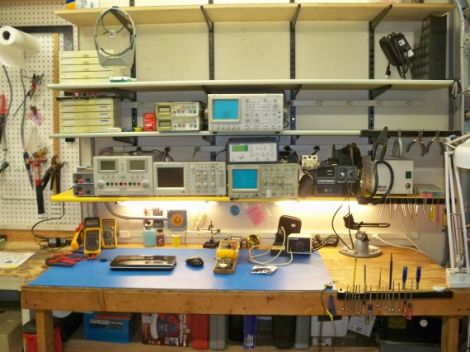
If you’ve ever looked at one of [Todd Harrison’s] teardown or how-to videos closely, you would likely notice that his work bench looks like a standard hacker workspace. While we all try to keep our work areas clear of clutter, it’s not uncommon for components to pile up, cords to tangle, and things to get messy. [Todd] decided it was time to get a bit more organized, so he recorded a video showing how he went about the process.

Part of [Todd’s] work revolved around adding shelves to his bench so that he didn’t have measurement equipment stacked on top of one another. He also spent a good amount of time adding 30 additional plug sockets to his work space, replacing the single socket he had been struggling with for years.

Obviously this is not really a hack in and of itself, though this sort of reorganization is an important to efficient hacking all the same. We like the fact that [Todd] took the time to explain his process and materials in great detail – it will no doubt be helpful to those new to hacking.

Continue reading to see [Todd’s] video in its entirety, or swing by his blog for more pictures and details.

[Read more…]

Grabbing data from a Rigol 'scope with Python

While a fancy Rigol 1052E oscilloscope is a great tool and a wonderful portable oscilloscope we heartily recommend, sometimes you just need to use the more ‘advanced’ functions of an oscilloscope. Luckily, [cibomahto] figured out how to use a Rigol scope with Python, allowing for easy remote viewing and control of a Rigol 1052E ‘scope on any desktop computer.

[cibomahto]’s Python script grabs the screen and can send commands to the oscilloscope, effectively obviating the need for the slightly-terrible Rigol Ultrascope software. Not only that, controlling the 1052E is possible under OS X and Linux because of the portable Python nature of [cibomahto]’s work.

The Rigol DS1052E has become the de facto standard oscilloscope to grace the workbenches of makers and hackers around the globe. With a small price tag, the ability to double the bandwidth, and an active homebrew development scene, we doubt [cibomahto]’s work of grabbing data over USB will be the last hack we’ll see for this fine machine.

Thanks to [Markus] for sending this one in.